Showing posts with label Design Inspiration. Show all posts

Wednesday, June 18, 2014

The Crafting Bug

Picture from Ashley Brooke Designs.

Crafting has always been a passion of mine.  It's honestly one of the most relaxing and rewarding things I do.  After college though, I kind of hit a wall when it came to being creative.  I guess after four years of projects, deadlines, and 100s of trips to Hobby Lobby, I got burnt out.  I've tried little projects here and there but nothing has really kept my attention or made me want to be creative, until now!

Ever since I started working at Michaels, the crafting bug has hit me hard!!  I find myself inspired every day to try out new techniques and begin exploring this passion again.  Just the other night I was inspired by an item I saw online and thought, "I could make that!"  which then sparked the idea of opening an Etsy store.  I think it would be fun to get paid to craft; plus it would force me to keep pushing the creative bounds and learn new things!  

The more I thought about opening an Etsy store today, the more excited I got about the possibility.  Not to mention that Michaels has an incredible Martha Stewart craft section, and I want every. single. piece.  Seriously.  I don't know what it is about the Martha Stewart line but I'm loving everything she has, and it's giving me the confidence to try new things; like embossing. It looks pretty cool and from what I've read, it should be fairly easy!  Now I just need to stretch my budget a little further so I can buy the supplies.  Anyone want to gift me a Michaels gift card!?  Haha kidding.  Sort of :)

Once I get a few items made, I'll look into opening the shop.  Any thoughts on what I should name it????  

I'm off to brainstorm more projects!

Leave a comment below with your shop name ideas.  If I pick yours, you'll get 10% off one item once it opens! 

Tuesday, January 8, 2013

Haiti God Moments: Dorothy's

As you all know, Dorothy's orphanage holds a very near and dear place in my heart.  I absolutely love her, the work she's doing, and all of the kids.  It warms my heart every time I get to hug Dorothy's neck or bend down and scoop up an armful of her kids.  I love it there.

This time around, however, our trips to Dorothy's were different than the past two trips to Haiti.  Because we were not staying at her place, we did not get to see the kids as much as usual.  While I missed seeing the kids as much, I found staying at Jim & Debbie's allowed me to return more rested and energized.  I was much more open and ready to play with the kids this go round.

It was also really incredible when we pulled up to Dorothy's house the first day.  This was the first time mom got to experience where I had been staying and working over the last year.  As soon as we got out of the car, you could hear the kids screaming "Cassie-Allyson!! Cassie-Allyson!!"  Mom thought it was cool, but I found myself giddy with excitement to go see them.  Cassie and I ended up rushing out to the backyard so we could wrap our arms around the kids.  I completely bypassed the guests in the house, and forgot to show mom, Amy, and Amanda around first.  Those initial moments, seeing the kids for the first time in 7 months, and them screaming with excitement to see us is a feeling you can't describe, you just have to experience.  I eventually went back in the house and introduced mom and met the guests.  One of the ladies inside introduced herself to me and asked my name.  When I said my name was Allyson, she goes "Ooh!! You're the Allyson the kids keep asking for!!"

And my heart melted.

They don't just remember me when I pull in the driveway.  They ask for me by name even when other guests are there.  Cassie put it best when she said in that moment she realized that the kids love us.  We both know how much we love them, and we hope and pray we can make an impact on their lives and provide a loving support to them, but it wasn't until that moment, that we both really understood for the first time that they do truly love us.  We have impacted their life, in a positive way.  They love and miss us just as much as we love and miss them.

Love.  It's such a powerful thing.

I experienced this moment again when it came time to leave Dorothy's on the last day.  I had been dreading saying goodbye to the kids, as it is always hard for me.  This time however, I was holding back tears all morning.  When I went outside to say goodbye, Johnny ran, jumped in my arms, and just hugged me as tight as he could.  When I couldn't put off goodbye any longer, I whispered to him "mwen renmen ou" (I love you in Creole).  His head popped up and he grinned and said I love YOU!

And my heart melted again.

He understood.  Not only did he understand but he responded with the same love.

It was in that moment that I got a glimpse at how big God's love is for us.  I recently read a book called Kisses From Katie, about a young girl who moved to Uganda to do mission work.  Right before we left for Haiti, I watched this clip where she shared about how she understood how massive God's love is through the adoption of her children.  She said that while we are not direct biological children of God, like Jesus is, He still loves us just as much as he loved Jesus.  In that moment, where I found myself loving this child as if he were my own, even though he did not come from my body, I understood how big God's love is.  He loves all of us just as much as he loved his very own son, Jesus.  What an incredible and inspiring love that is.  Katie verbalizes it better in this audio clip:


It never ceases to amaze me at how God shows His love for us.  He did it in so many ways this past week, but when Johnny looked back up at me and said he loved me, it was as if God himself said I love you. Just as you love this little boy, I love you even more.

"See what great love the Father has lavished on us, that we should be called children of God! And that is what we are! The reason the world does not know us is that it did not know Him." -1 John 3:1 

"I will be a Father to you, and you will be my sons and daughters, says the Lord Almighty." -2 Corinthians 6:18
(Me & Johnny being silly.  January 2013)

What an incredible God we serve!

Wednesday, October 31, 2012

New Addition

Two posts in one day....Try to contain your excitement!  Ha!

Any who...I thought I'd share a quick little update with you: I got a new desk!

I have been dying to have a real desk for sometime now.  For years I have had this little craft fold up table that "functioned" as a "desk."  My previous desk foldable table wasn't even three feet long and really limited my ability to use it in any way.  While it worked great for crafting, since I didn't have to worry about paint getting on it, I simply could not use it for anything else.  Not to mention I've been using this huge, clunky, green desk chair that I absolutely hated with that little table.

Yeah it was not a very good combination.

SO when the possibility to have an apartment (in my hopefully very near future) arose, I started looking for some key furniture pieces I would be needing.  That's when I came across this really beautiful desk at a great price! I simply could not turn the opportunity down.  So I emailed the owner, worked out an even better price, and got dad to go with me to pick it up!

The desk is absolutely perfect and exactly what I've been wanting!  The best part however, is when we arrived the owner gave me her previous desk chair for free!  It's a cute little red leather chair.  The red doesn't quite go with my current decor but it's WAAAY better than that ugly green chair so I took it! I loved the shape of it, and red will easily fit in with how I hope to decorate my apartment when that day comes.

Here take a look:

BEFORE: (I told you that chair was ugly!)

 AFTER:

Isn't it pretty?!  The desk is a little large for my current room, but it'll be perfect when I get my own place!

Tuesday, October 30, 2012

Quick Tip Tuesday

Don't be afraid to mix and match prints when choosing fabrics for your upholstered pieces. As long as the colors coordinate and one print does not over power the others, mixing prints works beautifully!  I heard a trick once to help make your job easier if you don't fully trust your fabric-mixing/picking abilities (yes I made that up).

It's called the "squint test".  Lay out all of the fabrics you're considering and squint your eyes.  If one pattern stands out a lot more than the rest, then discard that fabric and pick another.  If they seem to all blend together then you've got a winning selection.

When I performed my design test at Ethan Allen, he praised my ability to mix patterns and fabrics.  I didn't use the squint test, but hey not everyone has gone through design school!

Here are some samples:


Tuesday, October 16, 2012

Quick Tip Tuesday

Painting a small room, like a half bath, in a rich/warm color will create a more intimate and cozy space.  Dark colors can be overpowering in large spaces, but are great in small doses.  Your first instinct may be to paint small areas in lighter colors, but try switching it up.  Trust me it's beautiful!  Here take a look..

 Don't understand the angle of this one (guess they were trying to show off the ceiling) but it's beautiful!
 We all know how much I love grey. 
Ignore the rose kleenex box and soap dish, the brown is beautiful!

Sunday, October 14, 2012

Jute Creations

After seeing multiple projects on Pinterest and other blogs I follow, I'm beginning to love jute crafts!  I've always loved adding organic touches to warm up a space, and this may become my go-to trick.  From what I've gathered a little jute, hot glue, fabric stiffener, and an object waiting to be wrapped is all you need!  I haven't tried creating anything yet, but a roll of jute is on my next list at the craft store!

Here are some of my favorite applications:
When I graduated from High Point, I went through the donate/trash pile outside our dorm and picked up a few fun shaped vases.  I had planned to paint them white, but I think at least one will become wrapped in jute now :)

How adorable are these???  Adding wooden letters is an easy, cheap, and fun way to add character to any space.  I've got a ton that I've used over the years just sitting unused now.  Usually I paint them to coordinate with my decor, but I'm definitely trying this!  Love, love, LOVE it (especially the little rosette detail)!!
How fun is this?  There are so many chandeliers with hideous or boring shade covers.  This is a cheap and fun way to add an organic touch and spruce up that old chandelier.


Yep, I think I'm gonna have to buy some jute!

Monday, August 27, 2012

Master Bedroom Makeover

A couple of weeks ago my sister's friend, Janice, contacted me for design help on her master bedroom.  She and her husband recently moved into a new home and wanted to update their bedroom from a traditional frumpy purple, to a cleaner more transitional space.  She and her husband had already purchased a set of furniture but wanted to change up the paint and decor.  After consulting on a paint color and getting the furniture in place, Janice and I set out shopping for bedding, window treatments, and accessories for the room.  She wanted something clean, with texture, and in the blue/grey/green family.  We found some beautiful selections from West Elm (a new favored store of mine that just opened at Southpoint, you should check it out!) and got the room all set up.  I really enjoyed working with Janice.  She was very pleased with how the room turned out, as was I, and I believe it will be a great bedroom ensemble for them to enjoy for years to come.  Here are some before, during, and after shots.  Enjoy!

 This is how the previous owner had the bedroom set up and displayed when Janice and her husband bought the house.
 How I first saw the room. (Sorry for the terrible quality I forgot my camera and had to use my phone)
 The master bedroom connected to their private bath which was painted in a beautiful green they wanted to keep.  We chose a blueish/green gray for the bedroom to tie in with the bathroom.
The finished product.  She has a beautiful wedding picture that will be going above the bed soon.


If you, or someone you know, would like design help on their next project let me know.  I am always looking for ways to expand my portfolio and get more design experience.  

Send me an email for more information on the services I offer, pricing information, and ways I can assist in your remodeling projects. 

allysonhemric@gmail.com

Tuesday, July 24, 2012

Gender Neutral Bedroom

Are you trying to find a style for your bedroom that will mesh your feminine flair with your spouse's...well...not so feminine style?  This can be a difficult task for any couple to achieve.  Trying to find that perfect blend of masculine mixed with feminine, while still remaining gender neutral can be a daunting task.  Not to worry however, the best way to find some neutral ground is through compromise!!  Ladies say goodbye to your over the top floral and lace items, and gentlemen put your sports memorabilia else where.  Neither of these items will find a home in a gender neutral space.  Save the lace for your personal office ladies, and guys save the sports items for your man cave.  The bedroom is a place where two become one and must equally feel at home.  Some easy ways to do this are:

1.  Pick a color you can both agree on.  Pink and bright blue probably aren't going to cut it.  Some great neutral colors are:  beige, grey, light blues, greens, and yellows.  My personal favorite color when combining styles is to choose beige or grey. They are timeless and will transition flawlessly as your design aesthetic evolves. They both can have a masculine or feminine quality depending upon the furnishings you place in the room.  If you or your husband are dead set on have a particular color the other can't imagine, try putting it in small areas as an accent rather than on the walls.  After all, pillows, curtains, and lamps are a quick, easy, and cheap fix for a new look!  If you get tired of that bright red or duke blue accent lamp a quick coat of spray paint can do wonders!

This floral curtains and tea set add a feminine touch, but when set against a masculine bed, comforter, neutral pillows, and sleek hardwood furniture the space becomes neutral.  Both genders are equally represented without overpowering the other one.
If you take the bed skirt, sofa, and side table out, this room would scream masculinity. However there are equal touches of both sexes here making the space appropriate for anyone!

2. Make sure you balance the masculine and feminine touches in the room. If you choose a very straight lined, masculine, wood bed, then soften it with a more feminine duvet.  This also goes the other way. If you purchase a hand carved, ornate, and luxurious bed frame, then tone it down with a masculine comforter.  This works the same for every other piece in the room as well.  Maybe all of the furniture and bedding has a distinct masculine flair.  You can easily add a soft touch through a crystal chandelier or lace throw pillow on the bed.  Making sure that you and your husband both feel represented throughout the space is key!  If every piece only represents one person, you will never create a cohesive design.  Some other great ways to balance the two: Add a rustic bedside table with a feminine lamp on top.  Also try a sleek leather chair he loves with a soft pillow on it.  There are many easy ways to mix the various styles into every area of a bedroom.  Remember that you must compromise!  For every feminine accent you add, he gets to add his own masculine touch somewhere in the space and vice versa. You'll be happily surprised how well everything will blend when you make  decisions together with the other person in mind!

This is a great example of how to balance the two perfectly.  The masculine leather tufted headboard propped against a soft and luxurious mound of pillows positioned beside a feminine antique chair is a combination to die for.  Both genders are equally represented through color, texture, furniture, and accessories.
This bedroom hands down wins my favorite gender neutral space of the night.  The architecture of the exposed wood beam ceilings above the dark gorgeous hardwood floors makes this a space any man would feel comfortable in.  Then you add a beautiful chandelier, a sofa, and side chair and it's a room fit for a queen as well.  The best part is that not only is each gender represented uniquely in some pieces, there are also key pieces that flawlessly represent them both.  Take the side table for example.  Its rustic exposed wood screams masculinity, but the curvilinear shape adds a feminine touch. Then you have the bed; clean sleek lines both genders can enjoy topped with a neutral bedding and pillows.  Simply breathtaking!


3. Choose neutral patterns. That Duke comforter he had in college, and your Hawaiian bedding are simply not going to cut it in this space.  Go for patterns such as stripes, plaid, houndstooth, or chevrons.  While plaid may sound very masculine and chevrons may scream feminine to you, both can be a very beautiful neutral choice if done in the right scale and colors.  Stripes are a pretty safe choice, but search around for other options you can both fall in love with.  Patterns are a great way to add interest to a bedroom without going over the top.
 A beautiful example of a neutral chevron.  This feminine pattern when paired down to masculine colors becomes a neutral palette both can enjoy! 
Great example of how to make plaid gender neutral.  Add a rustic vibe to your bedroom with this bedding but soften the look with a one-of-a-kind headboard and monogrammed throw pillow.


4. Add personal touches to your bedroom. My favorite tip for when designing a couple's bedroom is to include personal items you both made, bought, or found together.  Things like pictures of the two of you, souvenirs from recent trips, furniture you bought together, or decorative pieces you found scouring the flea market.  Whatever it is that you and your husband enjoy the most together, add something from it to your space.  Maybe you both love collecting old records; then create artwork out of some of your recent finds.  Maybe you're both photographers; frame a few of the pictures you took together.  Or perhaps you both love antiques; add your favorite find to the bedroom whether that be a side chair, table, or even the bed itself.  Adding reminders of all the things you love to do together in such an intimate space will bring you closer together and create a cohesive feel you can both fall in love with!


Creating a gender neutral space is not difficult, it just takes some patience.  Remember to keep each other's wants and needs in mind when designing your bedroom and it will turn out perfectly!


Do you have a favorite tip when it comes to decorating for both sexes?


*Disclaimer: All pictures found through Google images. I do not claim these as my personal work, simply my inspiration!*

Thursday, July 19, 2012

Afraid of Color?

Don't be!

Color is a great way to add a little interest to a space and freshen it up.  Over the last few months I have challenged myself to experiment with bold colors both in design  and in my wardrobe.  As a design student I always believed that a designer's clothes were a direct reflection of their design ability.  If a designer can't match colors, textures, and patterns in their outfits then there is no way they can do it in a space. I also know from my personal experience, how I dress is a direct reflection of my design style.  I typically go for classic pieces with unique accents.  As I challenge myself in design with bolder colors, I have tried to reflect that challenge in my wardrobe.  I've added some great bold jewelry pieces, shoes, and colorful items to my closet.  I try to push myself to try new styles, patterns, and colors each day.  Right now these are some of my favorite color trends in design and style.

Turquoise & Yellow:


Outfit from J's Everyday Fashion (it's a great blog if you aren't following it yet!)

Kelly Green & Yellow:

Orange & Turquoise:

What are your thoughts on color?  Are you afraid to try bold colors?  What's your favorite color combination?

Sunday, April 29, 2012

The View From Here: Spring Cleaning

While moving out is bittersweet this year, I absolutely love going through everything and cleaning out the things I don't need anymore.  For the last few hours I've been going through my closet, drawers, and supplies to de-clutter and cut out items I never use.  I've got the window open, fresh air coming in, some great music from my childhood playing, and stuff everywhere!!! However, I am done and feel 100% better!  The real packing process will begin tomorrow :)
 The basic necessity for any proper Spring cleaning.  Fresh air :)
 All of my design supplies/materials I don't need anymore.  I'll let Jessica shop before throwing them out.  Oh the perks of living with all upperclassmen! :)
The load of trash I was able to get rid of!

What's not seen (because I forgot to take a picture), is the tub of clothes I took downstairs to the donate pile.  I feel much more organized and clutter free now!!   

Thursday, April 26, 2012

Study Break aka Procrastination

I should be studying for my final exam that I have to take tomorrow afternoon, but I can't seem to focus.  I presented my Senior Seminar project today and I am SOOOO very excited that I can't get my brain to understand that I still have one more exam to take before college is truly over.

Did I just say over?   Weird.

I felt such a great sense of pride today as I walked out of the presentation room.  That is the last project I'll have to present here at HPU.  Today is the last time I have to walk into Norton Hall to do any type of work.  Today I finished my interior design degree.  Can you say crazy/the most exciting day ever?!?

I honestly didn't think this day would come.  But I made it, and I can officially say I survived design school!   And since I am so eagerly looking for another procrastination method, I'll post some pictures from my senior seminar project for you to enjoy!


This is the building I was asked to design for my Senior Seminar project.  It sits downtown in High Point, NC in the center of the furniture market area.  It is 8 stories high with a basement below.  I was asked to propose a design that would allow this building to become the New School of Art & Design for High Point University.

 This is a view looking into the space that I made into a gallery for the New School of Art & Design (see below).  It had floor to ceiling windows, lots of natural light, but very little display space to begin.
This is a view of one of the floors higher up in the building that was unfinished.
My proposed design for the 2nd floor of this building.  This floor houses security offices, gaming studios, and graphic design studios.  There are also multi-use classrooms as well as a large locker room for students.
 My proposed design for the 3rd floor.  This is where you'll find the student lounge (see below) and photography classrooms.  There is one large darkroom as well as 6 individual darkrooms for students to use independently.
 My proposed design for the 5th floor.  This is where the Interior Design studios will be located, as well as two large critique rooms and two material resource rooms for students.
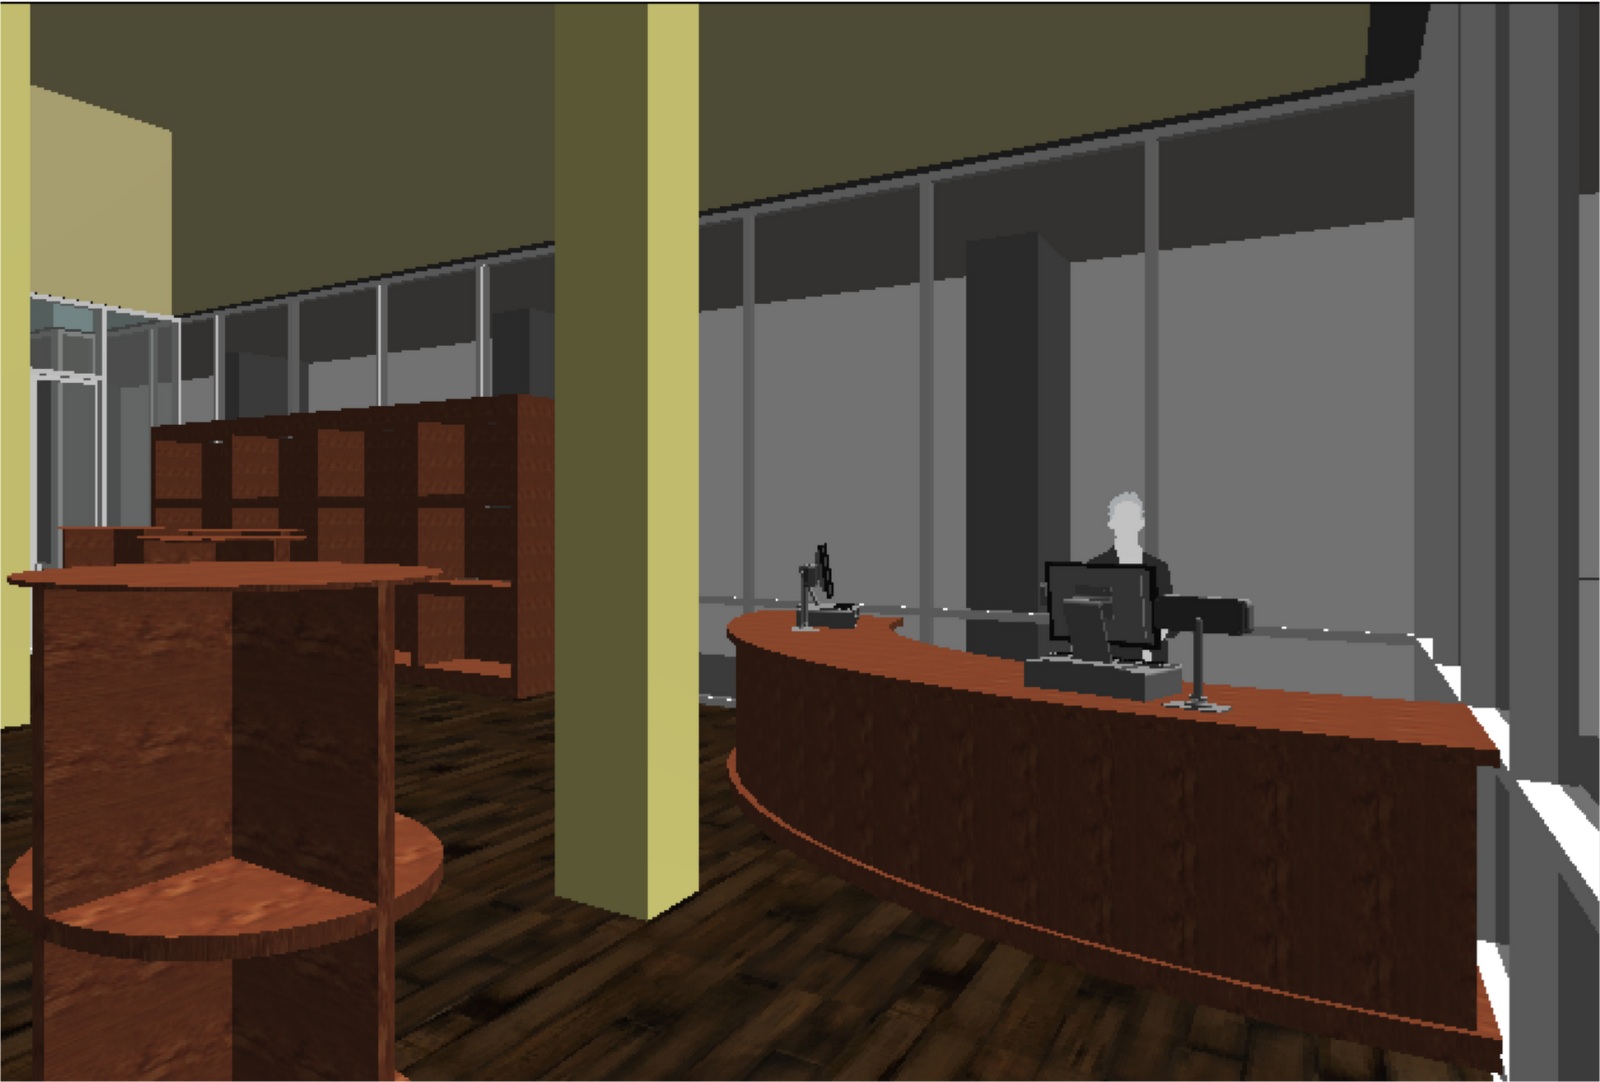
 Above is a rendering of what I would propose the lobby to look like for the New School of Art & Design.  I designed a custom fountain that sits under a large and beautiful crystal chandelier.  On either side there are large glass doors leading you into the gallery and retail space.
 A rendering of what I would propose the gallery look like.  Those are curved moveable wall systems that will allow for various art displays to be in the space.  They are covered in bold beautiful fabrics by Knoll that I am absolutely in love with!
A rendering of the student lounge.  All of the seating is moveable to allow students to work collaboratively and have a space to come to relax.  There is a large kitchen area in the back equipped with snacks, coffee machines, and a refrigerator for all of the late nights! The furniture is also covered in the same fabrics as seen in my gallery space to add a pop of color.
 Perspective of what the retail store would look like.  I chose to put in a 24-hour access store for students to buy and have access to all of their daily project needs.  No more late night Hobby Lobby runs!
And then lastly, this is an axonometric view (aka looking down into the space) of the first floor.  This allows you to see how the lobby, retail area, and gallery are laid out in the space.


While I am very glad that this project is over, I also really enjoyed getting to work on this type of space.  What you see above is only a small portion of my project, but I think they give the best insight into my design.  I can't believe my last project here at HPU is done.  Hope you enjoyed it!

Tuesday, April 24, 2012

As Promised...Picture Overload

Earlier this week I showed you the before pictures of the showroom I helped setup this market.  Well, as promised, here are the after pictures.  I can't take credit for the furniture selection, placement, or fabric applications in the showroom, but I did help unwrap, position, accessorize, and light all of the areas.  Take a look:

 First view when you walk into the showroom.
 Around the corner from the main door.
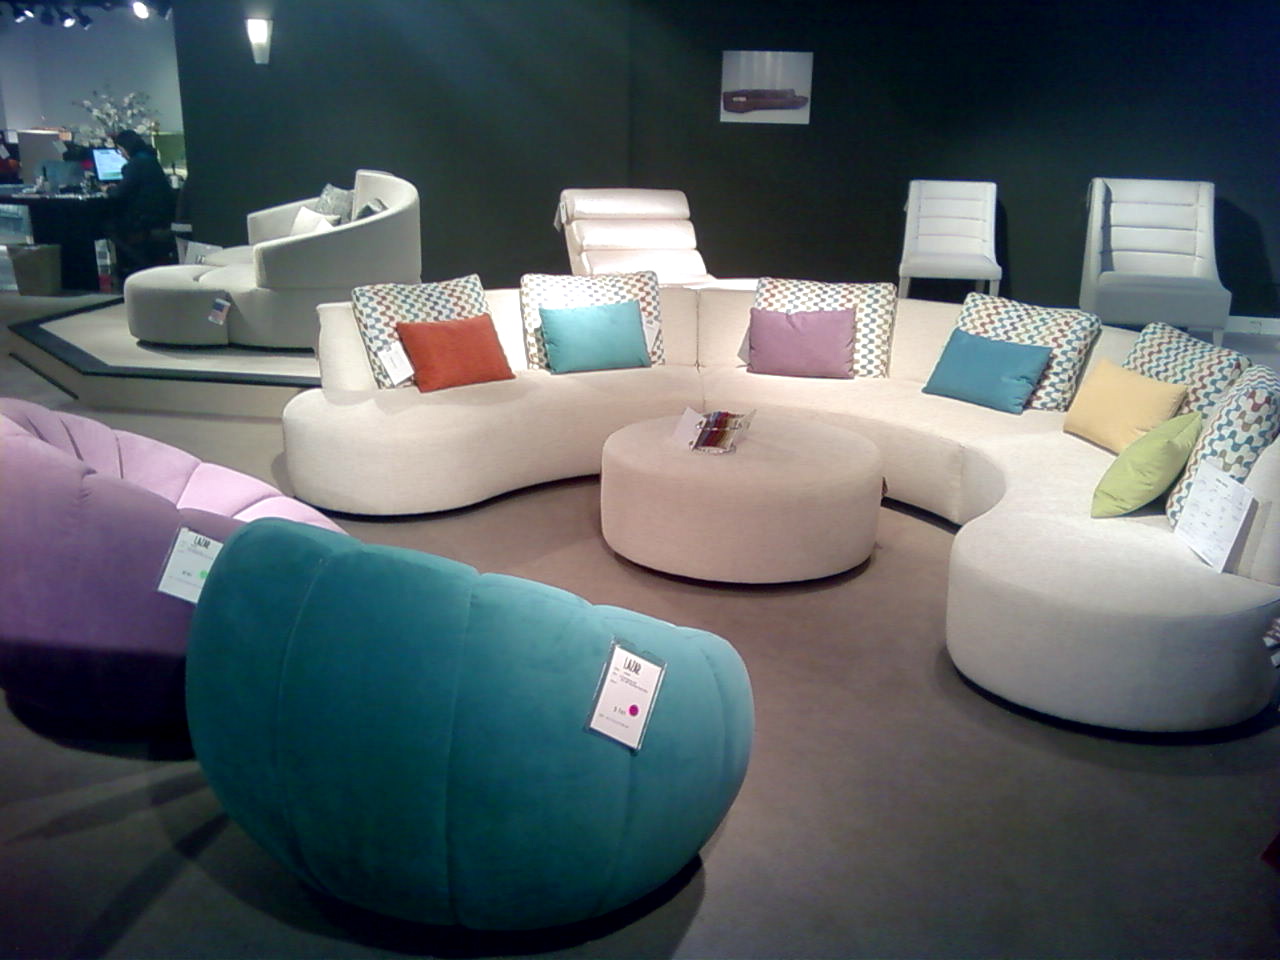
 One of my favorite areas in the showroom. The Gemini sectional with some great new fabrics and bold colors.  Oh, and did I mention how much I LOVE the little round chairs called Le Pouf.  They are so fun and oh so comfortable!
 The first area in the showroom I helped setup.  Funny thing is I was just telling my aunt Missy that I wasn't sure denim was in right now.....clearly I was wrong.  Ha!
Lounge and bar setup in the front of the showroom. I love all of the colors used this market!
The Ava sofa.  My absolute favorite piece this market.  I love the clean lines and shape of this piece.  I've always wanted a beige sofa and I've fallen in love with this one!  There was another sectional in the back that was more plush and comfortable, but I just love the shape of this piece!


Debra did a great job selecting pieces and fabrics for this market.  I'm so blessed to have had the opportunity to work with such a great lady and get some hands-on experience with design.  It challenged and inspired me to push my abilities and not just go for the ordinary.  I love getting these opportunities and truly enjoyed this market more than any before.  I'm a little sad that it's the last market I'll work as a student, but I look forward to coming back hopefully as a buyer next year!

Thanks again to Debra Venti for allowing me to have the opportunity to work with her this market!  You are an incredible designer and woman!  Thanks for all you've done for me these last few markets!

Wednesday, February 1, 2012

Design Inspiration: Make your Bed

The other day, my roommates pointed out that they can tell how my morning goes by how my bed looks after I leave.  If things went smoothly my bed will be perfectly made.  If I'm rushing out, or late to class my bed will be left unmade.  I found this quite entertaining because lately I've gotten into the habit of making my bed every day. It has come to the point that it drives me crazy to not have my bed made.  I'm not quite sure what started it, but I have to make my bed every day.  If it doesn't happen first thing when I wake up, it will be done as soon as I return from class.  I've realized that having your bed made makes the room look crisp and clean.  You can have a spotless room but if the bed is unmade it still looks messy.  So needless to say, I think it's important to make your bed each day.  It adds the finishing touch to your space, and for me it keeps life organized.  

Here take a look, which do you think looks better?

These:


Or these:


Come on, you have to agree the rooms with made beds look 1000x better!

On another note, I also think it is very important to accessorize your bed with the appropriate bed pillows.  Two basic pillows simply do not finish the look.  Throw some decorative pillows into the mix. Add some color, texture, and interest with such a simple change.

 Of course I love this one for the colors, but the patterns are amazing!  Don't be afraid to mix patterns as long as the colors coordinate. Try different size pillows in varying shapes for added interest.
 Here are four options of how to arrange pillows.  While I don't particularly love the top left one, it may work for you.  I would recommend the other three!
 Coordinate your colors with solid and printed fabrics.

 This one has a ton of pillows but I love it! If your fabrics coordinate and you vary the shapes you can pull the look off.  If you're new to accent pillows this may be a bit much or too advanced, stick with a more simple set up.
I love love LOVE a bolster pillow!  Throw one in with your solid fabrics for a pop of color and added interest!

You can even pull this look off in your kid's rooms!  Don't be afraid to accessorize their room too.  Kids love colors and prints.  Stick with smaller prints that can grow into new rooms with them.  It's also never too early to teach them to make their beds!